.png)
6 Ways To Improve Your Instagram Aesthetic
- Sep 11, 2017
- 7 min read

Don't worry. This post is specifically designed for regular people like you and me. You can have a nicer looking Instagram without being a professional photographer, an artist, or a full-time fashion blogger. My Insta certainly isn't perfect but it's come a long way. In the past year I have invested just a bit of time in learning how to at least step it up on Instagram and I'm about to give you everything I know!
Before we dive in, let's talk about why the heck you or I or anyone else should care about having a "pretty Instagram".
At the end of our lives, it doesn't matter. On your death bed you won't scroll through your Instagram admiring how bae your content was. With that being said, it shouldn't be something that consumes you or keeps you from enjoying wonderful moments of your life because you're SO concerned with getting the perfect 'gram. However, improving the quality of your Instagram content is important if you run ANY kind of business (direct sales, Etsy shop, photographer, blogger, influencer, restaurant, musician, public figure, consulting, etc.) because these days, it is a major source for networking and finding new business. You'll need to stand out, appear professional, and showcase what you do with clarity and cohesiveness. This leads to more engaged followers which leads to more business. You get it.
Additionally, it's fun and I don't care how many baby boomers make fun of me for taking a photo of my brunch tbh.
1. Don't Wing It
Have you ever taken a bunch of photos that you thought were so cute and artsy and edited so well and then when you look at your Instagram profile, it still looks messy and anything but artsy? ME TOO. STORY OF MY LIFE. So I had to enroll some professional social media consulting (aka my two little sisters) for help. Both of my sisters are photographers and one is a Studio Art graduate who manages people's Instagrams for a living..so yeah...they just KNOW how to make things look good. My journey to a pretty Instagram started with an intervention from them (lol kidding kind of).
The first thing they told me was I simply had too much going on. I was using different filters as well as different types of photos that just didn't go together. We discussed that although people weren't following me because I had a pretty Instagram...my mismatched Instagram wasn't helping me get any new followers. I had pic collages, black and white photos, quotes, and dark iPhone pics that simply made it looked messy. No denying it. They told me I had to make a decision....what do I want my Instagram to even look like? Do I want something bright, fun, whimsical, and airy? Do I want something gray and urban? Do I want lots of blues and greens to create a mellow, natural look? I had to pick. Because if I wanted my page to look awesome, I couldn't do it all. Having a fresh, clean aesthetic could help me attract other people to my page and help me to gain new business.
HOMEWORK ASSIGNMENT 1: Go scour Instagram and look at your favorite bloggers and photographers profiles? What do you like about them? Which ones are your favorites?


2. Pick Your Content
Now that we understand that you simply can not post EVERYTHING, you have to decide what you will post. I decided I would post high quality, well-lit photos only. I would only post quotes that fit a design that matched my vibe. If I found a quote that I loved that didn't match my Instagram vibe, I had to re-design it to match.
With my line of work, I take photos of everything all the time. I have hundreds of group photos, selfies with my friends, and products. I decided all of my fun photos that weren't in good lighting, were blurry or messy could be posted on Facebook or on my Instastory! Problem solved!
Quotes + photos of people:

Lifestyle content:

Nature + outdoor content:

3. Pick your Colors
I recently got serious about what colors I would primarily use and my aesthetic instantly approved. For me personally, I like to have as much white as possible with bright pinks, turquoise, and baby pink. As long as every picture I post has a bright background and at least one of those colors, I've found that it always looks good! I obviously can't get it perfect every time, but if I use these colors about 85% of the time, the overall aesthetic will look pretty good. And it's easier than I thought! However, it does mean that I say 'no' to a lot of really cute pictures because they just don't "go" with everything else. Those photos are used for instastories or my blog.
My advice for picking your colors is to browse color palettes on Pinterest. This could literally take you hours if you allow it. Just pick a scheme that you like and go with it. You don't have to marry this color scheme. You can change your aesthetic whenever you get tired of this one. But the point of this is to decide on 1-3 colors that work together and don't clash.
My Instagram is bright. My friend Karhlee loves white with pops of black. My sister Allison loves muted earth tones. My other sister Lauren loves forest green and gray. They all look good! Just pick one that is true to you!
HOMEWORK ASSIGNMENT 2: pick your colors and your content. Make a mood board on Pinterest full of photos, colors, and typography that you love.


4. Commit to Consistency
If you take a gander at my Instagram, you'll see I use white borders around all of my photos. This was my sisters' suggestion. Because I have photos of people, things, and places I needed SOMETHING to tie it all together. I decided some borders would give it a more cohesive look. At first I had different sizes of boarders but now I commit to the exact same size every time and it looks 10000X better (photos below). I use an app called Whitagram to put the borders on and I use the same width every time. Sometimes it sucks because it means that I have to crop a really fabulous picture down to a square, but it's worth it.
You do not have to border to create consistency. Another great way to make it all look better is to use the SAME FILTER EVERY TIME NO MATTER WHAT. If you use the same filter or you edit all of your photos the exact same, it will look really nice all together.
I use apps like Whitagram, VSCO or A Color Story to edit my photos and I try to edit them the same each time. So figure out what you like and stick to it! Don't stress over which one is the perfect one. You just need to choose one that you are fine with using for weeks or months on end.
Exhibit A: Here we have 2 Instagram profiles with consistent border usage and color usage and one that doesnt. The 3rd screenshot is of my account when I was using different sized borders and shapes. See the difference consistency can make?


Inconsistent editing:

5. Use High Quality Photos
You don't have to be a photographer. You don't even have to have a DSLR camera. Your iPhone takes great pics (especially those of you with Depth Effect). But you do have to use really great pics to create a better aesthetic. Here's a crash course for taking better photos that will definitely get more likes:
+ Natural lighting! I almost never take photos for my Instagram at night for this reason. 9 times out of ten, I'm working with natural lighting that isn't in direct sunlight.
+ Clear away the clutter. Just take 2 seconds to make sure the background isn't busy or messy. If it is, MOVE!
+ If you can use a DSLR camera, by all means go for it.
+ Use the Rule Of Thirds (Google it!)
+ Find a simple, bright, clean space for your flat lays. Bedspreads don't look great. Go to Walmart and get a white poster board instead.
I actually have started using a DSLR camera and I pay my sister to take photos of me a couple times a month! It's great! We call it "Content Creation Day". We take an afternoon and we get all kinds of photos of things around my house, products that companies have sent me and several outfit changes. We knock it out in a couple of hours and I have content to work with all month that all match my bright aesthetic. It ends up saving me time and everything looks better! This is of course OPTIONAL! You can do bad all by yourself.
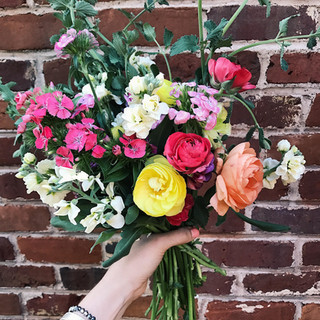
Here are a few images I captured on my iPhone. Nothing fancy. But they all have natural lighting and uncluttered backgrounds. It's really that easy!


6. Plan it out
You could take the most beautiful, cohesive photos and sometimes it still doesn't all work together quite right? There is a solution to this. I use an app called Planoly that allows me to plan out my posts, rearrange them, use color placeholders, and even schedule my posts. When I take a great shot, I edit it, drop it into Planoly, and ensure it looks great with the photos around it. It's a really cool app! Go get it! (this post isn't sponsored by Planoly. I honestly really use the app!)

All in all....
I hope these 6 tips help you reach all of your Insta-dreams. These few simple steps of deciding and then sticking to one theme will most definitely help take your profile to a whole 'notha level. Before you know it, your friends will be asking you how you make your page look so cute and you'll be able to nonchalantly act like my 2 baby sisters didn't just teach you everything you know about Instagram. You're welcome.
xoxo
jamie
Comments